How to customize themes using option information [Order confirmation email]
Have you ever wanted to display wrapping or message information added through Gift Option Plus in the order confirmation email sent to your customers?
This article explains how to customize Shopify’s order confirmation email to display gift option information added from the cart and product pages. Option information is stored using Shopify’s “Cart attributes” and “Line Item Property” mechanisms. We’ll show you how to use these to display the information you need in the order confirmation email.
If you just want to know the setup method quickly, please skip to the “Editing order confirmation email” section.
How option information is stored: What are Cart attributes?
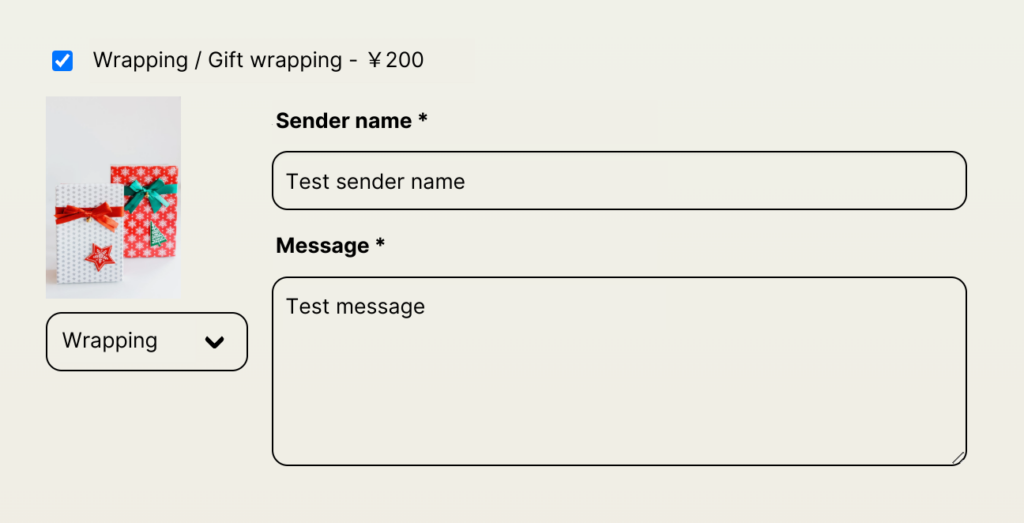
Cart attributes are a standard Shopify feature for storing information about the entire cart. Gift Option Plus stores option information added primarily from the cart page (e.g., wrapping type, message card content, etc.) in Cart attributes.
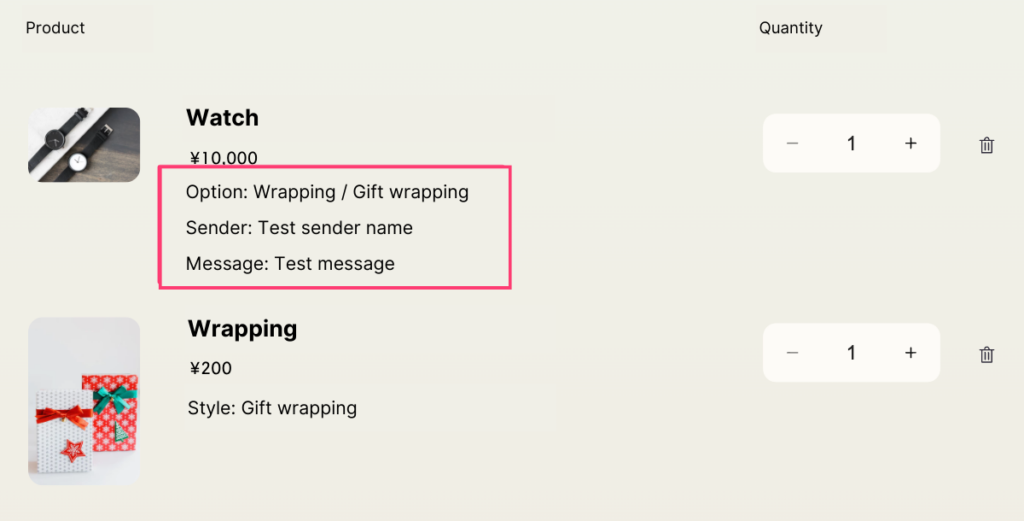
Example: When wrapping and a message are added on the cart page
| Key name | Value |
|---|---|
Option | Wrapping / Gift Wrap |
Sender | Test name |
Message | Test message |
This stored information can be displayed in the order confirmation email using the Liquid code explained later.
How option information is stored: What are Line Item Properties?
Line Item Properties are a standard Shopify feature for storing information tied to each product in the cart. Gift Option Plus stores option information added primarily from the product page in Line Item Properties.
Example: When a Noshi option is added to a specific product
Line Item Property information added to products is displayed by default under the product name in the cart and checkout. You can also customize the display/visibility and design through theme editing.
In order confirmation emails, you can use the line_item.properties Liquid object to display option information tied to each product.
Related articles and reference pages
You can check how Cart attributes and Line Item Properties appear in order details from the following pages.
For more detailed information and related customizations, please refer to the articles and official documentation below.

For more detailed information about Liquid objects, refer to the official documentation
Editing order confirmation email
Here are the specific setup steps.
First, refer to the following page to open [Customer notifications] > [Order confirmation] from the store admin screen.
Shopify Help Center | Customize email notification templates
- Click [Edit code] to open the email body (HTML) editing screen.
- Add the following Liquid code where you want to display the option information. If you’re not sure where to add it, after the ordered product list is a common choice.
{% comment %} Display order note if it exists {% endcomment %}
{% if note != blank %}
  <p><b>Order Note:</b></p>
  <p>{{ note }}</p>
{% endif %}

{% comment %} Display Cart attributes if "Option" key exists (e.g., when options are added from the cart) {% endcomment %}
{% assign gift_option_title = attributes["Option"] %}
{% if gift_option_title != blank %}
  <p><b>Gift Option:</b></p>
  <p>Type: {{ gift_option_title }}</p>
  {% comment %} Display "Sender" key if it exists {% endcomment %}
  {% if attributes["Sender"] != blank %}
    <p>Sender Name: {{ attributes["Sender"] }}</p>
  {% endif %}
  {% comment %} Display "Message" key if it exists {% endcomment %}
  {% if attributes["Message"] != blank %}
    <p>Message: {{ attributes["Message"] }}</p>
  {% endif %}
{% endif %}

{% comment %} Check each order item for Line Item Properties {% endcomment %}
{% for line in line_items %}
  {% assign item_properties = line.properties | where: "name", "Option" %}
  {% if item_properties.size > 0 %}
    <p><b>Options for "{{ line.title }}":</b></p>
    {% for prop in line.properties %}
      {% comment %} Properties starting with underscore (_) are internal, so don't display them {% endcomment %}
      {% unless prop.first contains '_' %}
         <p>{{ prop.first }}: {{ prop.last }}</p>
      {% endunless %}
    {% endfor %}
  {% endif %}
{% endfor %}
Brief explanation of the code:
{% if note != blank %}: Displays the order note if one exists.{% if attributes["Option"] != blank %}: Displays gift option information if a key namedOptionexists in Cart attributes. Similarly checks forattributes["Sender"]andattributes["Message"].{% for line in line_items %}: Loops through each ordered product.{% assign item_properties = line.properties | where: "name", "Option" %}: Checks if the product has a Line Item Property namedOption(a marker added by Gift Option Plus).{% for prop in line.properties %}: Loops through and displays Line Item Properties tied to the product. Internal properties starting with_are excluded.
Important: The key names Option, Sender, Message in the code above should be changed to match the field names (keys) defined in your Gift Option Plus widget settings.
- After editing, click [Save].
- Use [Send test] or place an actual test order to verify that the option information is displayed as intended in the order confirmation email.

Conclusion
In this article, we explained how to display information added through Gift Option Plus in Shopify’s order confirmation email.
We hope you now understand the basic mechanisms of Cart attributes and Line Item Properties, as well as how to edit email templates using Liquid code. By doing this, customers can confirm their gift option details alongside their order content via email, providing greater peace of mind.
If you followed the steps in this article and things aren’t working as expected, or if you have questions like “How do I do this with my theme?”, please don’t hesitate to contact Gift Option Plus support.
If you have any questions, please feel free to contact us through the in-app inquiry form.